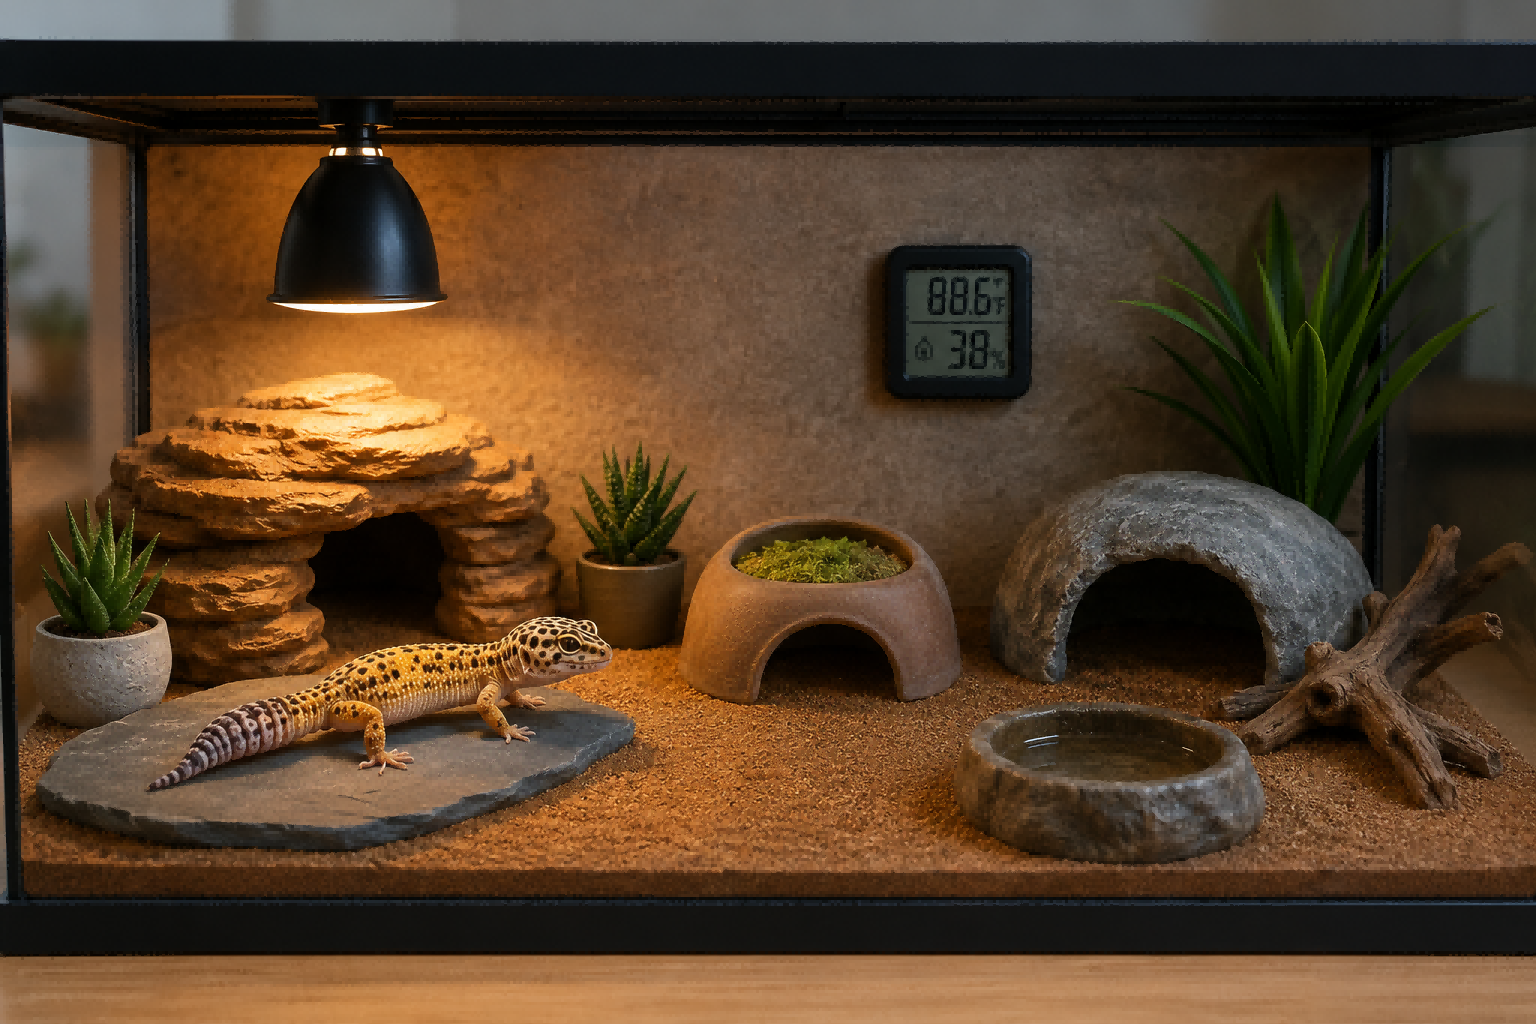
Getting temperature and humidity right is one of the most important parts of setting up a leopard gecko enclosure.
Leopard geckos are often described as beginner-friendly reptiles, but their habitat should not be based on guesswork. They need a clear warm side, a cooler retreat, a relatively dry main enclosure, and a localized humid hide.
This guide explains a practical beginner setup, how to monitor air and surface conditions, and which common mistakes to avoid.
Quick Answer: Leopard Gecko Temperature and Humidity Chart
| Setup area | Beginner starting point |
|---|---|
| Warm side / hot end | About 82–86°F / 28–30°C |
| Cool side | About 75–79°F / 24–26°C |
| General ambient humidity | Around 30–40% RH |
| Humid hide | Localized higher humidity for shedding support |
| Night temperature | May drop naturally; monitor rooms that become colder than the selected care guidance allows |
Care guides can list somewhat different numbers because they may measure air temperature, surface temperature, warm-hide temperature, or room temperature. The important task is to create a usable gradient and verify the actual enclosure with reliable tools.
The RSPCA leopard gecko care guide describes a hot end of 28–30°C, a cool end of 24–26°C, and a relatively dry enclosure with a humid hide.
Why Leopard Geckos Need a Temperature Gradient
A leopard gecko should not live at one flat temperature across the entire enclosure. It needs warmer and cooler zones so it can move between them while remaining sheltered.
A simple beginner layout includes:
- A warm side and warm hide
- A cool side and cool hide
- A separate humid hide
- A digital thermometer-hygrometer
- An infrared surface thermometer
- A secure, well-ventilated enclosure
The goal is choice: the gecko should be able to warm up, cool down, hide securely, and access localized moisture.
Warm Side: Where Heat Should Be Focused
Place the selected heat source on one side rather than trying to heat the entire enclosure evenly. Keep a secure warm hide available and verify both air and surface temperatures.
Different care approaches use overhead heat, under-tank heat, or other controlled sources depending on the enclosure. This guide does not claim that one method works for every setup. Whatever source is chosen should be compatible with the enclosure, regulated appropriately, and tested before regular use.
VCA Animal Hospitals cautions against in-tank hot rocks because they can create concentrated hot spots.
Cool Side: Why It Matters
The cool side is as important as the warm side. If the entire enclosure is too warm, the gecko cannot move away from heat; if it is uniformly too cool, the intended gradient is missing.
A practical cool side includes a secure cool hide, lower heat, good ventilation, and a suitable place to measure ambient humidity. Do not remove the cool hide because the gecko appears to favor the warm side. Choice is the point.
Humidity: Keep the Main Enclosure Relatively Dry
Leopard geckos do not need a tropical enclosure. The RSPCA recommends a relatively dry main environment, generally around 30–40% RH, with humidity measured near the cool end and ventilation adjusted when conditions remain too damp.
ReptiFiles’ temperature and humidity guidance also emphasizes distinguishing ordinary enclosure humidity from the localized humid hide.
- Do not keep the entire enclosure damp.
- Do not treat it like a tropical gecko habitat.
- Maintain ventilation and monitor ambient humidity.
- Provide localized moisture through a humid hide.
The Humid Hide: Localized Moisture
A humid hide provides a localized moist retreat without raising humidity across the entire enclosure. A beginner setup commonly uses a hide with a small entrance, a waterproof base or removable tray, and keeper-selected moisture-retaining material such as damp paper towel or sphagnum moss.
Check the hide regularly so it remains appropriately moist and clean. Replace soiled material and follow current care guidance for the chosen substrate. The humid hide complements the warm and cool dry hides; it does not replace them.
How to Monitor Temperature and Humidity
A reliable setup tracks three different conditions:
- Air temperature: general warm-side and cool-side enclosure conditions
- Surface temperature: specific warm-hide, slate, substrate, or basking surfaces
- Humidity: ambient enclosure moisture and, when needed, localized humid-hide conditions
A digital thermometer-hygrometer helps monitor air temperature and humidity. An infrared surface thermometer provides quick spot checks. These tools answer different questions and should not be treated as interchangeable.
The current PetMD leopard gecko care sheet likewise recommends monitoring both warm and cool zones and using a point-and-shoot thermometer for immediate surface readings.
Where to Place the Humidity Monitor
A practical beginner approach is to place the digital monitor where it can represent general enclosure conditions, away from direct heat or water that would distort the reading. Check cool-side humidity and assess the humid hide separately when the equipment allows.
Recheck after changing substrate, ventilation, water-dish position, heat-source distance, or hide placement. Weather, room humidity, and heating can also change enclosure conditions over time.
Day and Night Temperature Considerations
Leopard geckos are active around dawn and dusk, and bright visible heat lights should not remain on all night. The RSPCA advises allowing nighttime conditions while adding suitable non-light-emitting supplementary heat when the room becomes too cold.
Measure the actual room and enclosure temperatures before deciding whether nighttime heat is needed. Use species-appropriate equipment, compatible control, and continued monitoring rather than relying on a colored night bulb.
Common Beginner Mistakes
Making the whole enclosure one temperature
A leopard gecko needs a warm-to-cool gradient rather than one uniform temperature.
Keeping the entire enclosure too humid
Keep the main enclosure relatively dry and provide localized moisture in the humid hide.
Forgetting the humid hide
Ambient humidity alone does not provide the same localized moist retreat.
Checking only air temperature
Air and surface temperatures can differ. Use both ambient monitoring and surface spot checks.
Using an uncontrolled hot rock
Do not use in-tank hot rocks; choose compatible, controllable heating equipment.
Not testing before regular use
Run and monitor the completed enclosure before relying on it, then adjust as needed.
Copying another species’ setup
Do not copy bearded dragon or tropical gecko temperature and humidity targets.
Beginner Leopard Gecko Temperature and Humidity Checklist
Before regular use, confirm that the setup includes:
- A warm side and cool side
- A secure warm hide and cool hide
- A separate humid hide
- A relatively dry main enclosure
- Good ventilation
- Air-temperature and humidity monitoring
- Surface temperature spot checks
- A compatible, controlled heat source
- No uncontrolled hot rocks
- Nighttime conditions checked
- The complete setup tested before regular use
- Current species-specific care guidance reviewed
Test and adjust conditions for enclosure size, room temperature, ventilation, substrate, heat-source distance, and hide placement.
How ReptiCore’s Starter Kit Fits This Setup
The starter kit includes:
- 50W PAR20 Halogen Heat Bulb
- E27 Deep-Dome Ceramic Lamp
- PID Dimming Thermostat Controller
- DHT-74 Dual-Sensor Thermometer & Hygrometer
- 12:1 Infrared Surface Thermometer
- Moist Hide with Removable Moisture Tray
It supports heating, humidity monitoring, independent surface checks, and humid-hide setup. It does not include the enclosure, substrate, dry hides, water dish, décor, feeding supplies, supplements, UVB lighting, or live animal. UVB lighting may be added if chosen based on species-specific care guidance.
Browse Leopard Gecko Setup for related habitat resources.
Review the coordinated components: Visit the Leopard Gecko Heating & Humidity Monitoring Starter Kit. Continue testing and adjusting the completed enclosure before regular use.
Frequently Asked Questions
What temperature should a leopard gecko enclosure be?
The RSPCA lists a hot end of 28–30°C and a cool end of 24–26°C. Confirm whether a care reference is discussing air or surface temperature, then test both zones in the actual enclosure.
What humidity should a leopard gecko have?
A common starting point is around 30–40% RH for the main enclosure, with a separate humid hide for localized moisture. Adjust according to measured conditions and current species guidance.
Do leopard geckos need a humid hide?
Yes. A humid hide provides a localized moist retreat without making the whole enclosure humid.
Should the whole enclosure be humid?
No. The main enclosure should remain relatively dry and well ventilated, while the humid hide provides localized moisture.
Where should I measure humidity?
The RSPCA recommends measuring ambient humidity at the cool end. Avoid positioning the sensor where direct heat or moisture would distort the reading.
Do I need an infrared thermometer?
It is a useful independent tool for surface spot checks. The digital thermometer-hygrometer tracks air conditions, while the infrared thermometer checks selected surfaces.
Can I use a hot rock?
In-tank hot rocks are not recommended because they can create concentrated hot spots. Use compatible heating equipment with appropriate control and monitoring.
Does the starter kit include UVB lighting?
No. UVB lighting is not included. It may be added separately if chosen based on species-specific care guidance.
Is this kit a complete leopard gecko habitat?
No. It supports heating, monitoring, surface temperature checks, and humid-hide setup, but the rest of the habitat and species-specific research are still required.